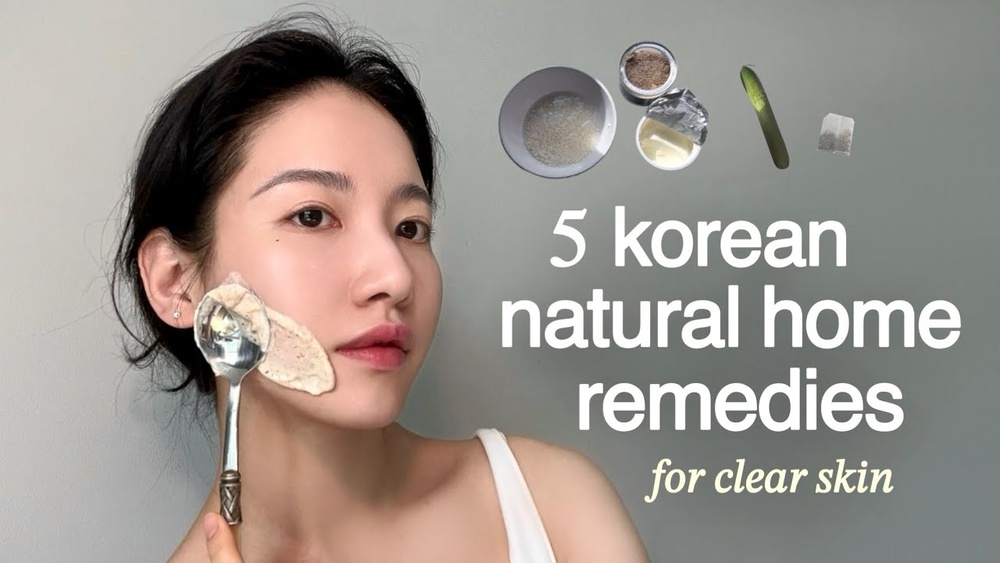

Cucumber Rice Mask
The Cucumber Rice Mask is a refreshing and effective Korean home remedy designed to soothe, hydrate, and brighten your skin without the need for expensive skincare products. This natural DIY mask combines the hydrating properties of cucumber with the skin-softening benefits of rice, making it a staple in many Korean households for decades. Let’s explore the ingredients, preparation, application, and benefits of this ancient beauty ritual.
Ingredients and Their Benefits
- Cucumber : Known as an “OG” ingredient in Korean skincare, cucumber is packed with water and vitamins that provide excellent soothing and hydrating effects. Traditionally, Korean households would place thin cucumber slices on their faces to calm irritated skin and replenish moisture.
- Rice : Rice has been a cornerstone of Korean beauty for centuries, dating back to the Chosun Dynasty, where women used rice water for cleansing and as a natural lotion. It is renowned for improving skin tone, brightening the complexion, softening the skin, and maintaining moisture.
- Honey : Honey acts as a natural humectant and antibacterial agent, helping to lock in moisture while gently nourishing the skin.
- Aloe Gel : Aloe gel is included for its soothing and moisturizing properties, which help the cucumber slices adhere better to the skin and enhance the calming effect.
How to Make the Cucumber Mask
To prepare the cucumber mask, you only need fresh cucumber and aloe gel. Here’s the step-by-step guide :
- Start by washing half a cucumber thoroughly to remove any dirt or impurities.
- Grate the cucumber or slice it very thinly to maximize skin contact and absorption.
- Apply a thin layer of aloe gel evenly over your clean face. This helps prevent the cucumber slices from sliding off and adds an extra layer of hydration.
- Carefully place the cucumber slices over the aloe-coated areas of your face, ensuring good coverage especially on sensitive or dry patches.
- Lie down and relax for 10 to 15 minutes, allowing the cucumber’s water content and vitamins to soothe and hydrate your skin.
- After the time is up, gently remove the cucumber slices and proceed with your regular skincare routine.
How to Make the Rice Mask
The rice mask complements the cucumber’s soothing effects with its brightening and moisturizing properties. Here’s how to prepare it :
- Take half a cup of rice. It can be any type, as different varieties all work well for this mask.
- Wash the rice about three times to remove impurities. If you feel the rice isn’t completely clean, rinse it a few more times.
- Cook the rice with one cup of water until it reaches a mushy consistency. This soft texture is essential for making the mask smooth and easy to apply.
- Remove the rice from heat and allow it to cool completely.
- Transfer the cooked rice to a blender. Add 2 tablespoons of water and 1 tablespoon of honey.
- Blend the mixture until it becomes a smooth paste, ready to apply on your face.
Application and Usage Tips
This combined cucumber and rice mask should be used with care to maximize benefits and avoid irritation :
- Application Duration : Leave the rice mask on your face for 10 to 15 minutes only. Leaving it on for too long can potentially dry out the skin.
- Rinsing : Gently rinse the mask off with lukewarm water to preserve skin moisture and avoid irritation.
- Frequency : Use this mask one to two times a week to maintain glowing skin without overwhelming your skin’s natural balance.
- Moisturize : Always follow the mask with your regular moisturizer to lock in hydration.
- Freshness : It’s recommended to make only enough rice mask for one-time use rather than storing leftovers, as homemade masks lack preservatives and may spoil.
Why This Mask Works
The synergy of cucumber and rice in this mask is what makes it so effective :
| Ingredient | Primary Skin Benefits | Historical/Cultural Significance |
|---|---|---|
| Cucumber | Hydrating, soothing, cooling, vitamin-rich | Long-standing Korean skincare staple for calming irritated skin |
| Rice | Brightening, moisturizing, softening, exfoliating | Used since the Chosun Dynasty for skin whitening and care |
| Honey | Humectant, antibacterial, nourishing | Common natural ingredient in traditional remedies |
| Aloe Gel | Soothing, moisturizing, anti-inflammatory | Widely used in Korean skincare for calming sensitive skin |
Additional Tips and Precautions
Before trying the cucumber rice mask, it’s important to consider a few precautions to ensure it suits your skin :
- Always wash your face thoroughly before applying the mask to remove dirt and oils.
- If you have sensitive skin or allergies, perform a patch test by applying a small amount of the mask on your forearm for 1 to 2 hours to check for any adverse reactions.
- If irritation occurs, discontinue use and avoid the ingredients that caused the reaction.
- Use fresh ingredients each time to prevent bacterial growth and ensure maximum efficacy.
By incorporating this simple yet powerful cucumber rice mask into your skincare routine, you can enjoy the benefits of glowing, clear skin naturally—without spending a dime on costly commercial products. Its combination of soothing hydration and gentle brightening makes it ideal for anyone seeking a natural path to radiant skin.
Yogurt Almond Mask
The Yogurt Almond Mask is a nourishing and antibacterial skincare remedy rooted in Korean beauty traditions, designed to help achieve clear, glowing skin without the need for expensive products. This mask combines the gentle exfoliating and antibacterial properties of yogurt and almonds with the soothing and moisturizing benefits of aloe gel, making it ideal for maintaining healthy skin and preventing breakouts.
Ingredients and Their Benefits
| Ingredient | Purpose | Skin Benefits |
|---|---|---|
| Yogurt (½ cup) | Base for the mask | Contains lactic acid, which gently exfoliates dead skin cells; antibacterial properties help prevent harmful bacteria growth |
| Almond Powder (2 tbsp) | Exfoliant and texture | Natural antibacterial effects; helps to remove dead skin cells and impurities; rich in vitamin E for skin nourishment |
| Aloe Gel (1½ tbsp) | Moisturizer and soothing agent | Calms irritated skin; provides hydration; enhances skin barrier |
How to Prepare the Yogurt Almond Mask
Start by grinding almonds finely if you are using whole almonds. Once you have almond powder ready, combine the ingredients as follows :
- Take half a cup of plain yogurt as the base.
- Add 2 tablespoons of almond powder to the yogurt.
- Incorporate 1 and ½ tablespoons of aloe gel to the mixture for added moisture and soothing benefits.
- Mix all ingredients thoroughly until you achieve a smooth, spreadable consistency suitable for facial application.
Application and Usage Tips
Before applying the mask, make sure your face is clean and free from makeup or impurities. Apply the mask evenly across your face, avoiding the eye area.
- The yogurt and almond combination provides gentle exfoliation, so it’s effective for removing dead skin cells without harsh abrasiveness.
- The antibacterial properties of yogurt and almonds help in preventing the growth of harmful bacteria that can cause acne and other skin issues.
- Aloe gel soothes the skin, reducing redness and irritation that might occur during exfoliation.
Allow the mask to sit on your face for approximately 10 to 15 minutes. This is enough time for the ingredients to work their magic without over-drying or irritating your skin.
Post-Mask Skincare Routine
After the mask duration, gently rinse your face with lukewarm water. Avoid scrubbing hard to prevent irritation. Follow up with your regular skincare routine, preferably including a moisturizer to lock in hydration and protect the skin barrier.
Storage and Frequency
Since this mask contains natural ingredients without preservatives, it’s best to prepare only the amount you need for a single use. Storing leftovers is not recommended as the mask may spoil or lose effectiveness.
Use this mask once or twice a week to enjoy its benefits without overwhelming your skin. Overuse of exfoliating masks can cause dryness or irritation, so moderation is key.
Who Can Use This Mask?
This mask is suitable for most skin types due to its gentle ingredients. However, if you have sensitive skin or allergies, performing a patch test before full application is essential :
- Apply a small amount of the mask to your forearm.
- Leave it on for 1 to 2 hours.
- Check for any redness, itching, or irritation.
If no adverse reaction occurs, the mask is likely safe for your face. If irritation develops, avoid using the mask and consult with a dermatologist if needed.
DIY Rice Toner
The DIY Rice Toner is an ancient Korean beauty remedy that leverages the natural nutrients found in rice water to brighten, soften, and tone the skin. This simple yet effective toner can be easily made at home with minimal ingredients and no costly equipment, making it an excellent option for those seeking clear, glowing skin on a budget.
Why Rice Water?
Rice water has been used historically in Korean skincare, dating back to the Chosun Dynasty, where it was cherished for its skin-brightening and moisturizing effects. Rice is packed with vitamins, minerals, and antioxidants that help improve skin tone, reduce inflammation, and maintain softness.
How to Make Rice Toner
- Choose Your Rice : You can use any type of rice — white, brown, jasmine, or basmati. The key is thorough washing.
- Wash the Rice : Rinse about half a cup of rice thoroughly, preferably 3 to 4 times. This step removes impurities and excess starch.
- Agitate and Soak : On the last rinse, gently agitate the rice in water, then leave it at room temperature for about 30 minutes. This allows the nutrients to infuse into the water.
- Strain the Rice Water : Use a fine strainer or cheesecloth to separate the rice grains from the water, collecting only the clear rice water.
- Optional Fermentation : If you prefer, you can ferment the rice water by leaving it at room temperature for over 24 hours. Fermented rice water is believed to contain more nutrients and enhanced skin benefits, though it may have a stronger scent, which some find unpleasant.
How to Use Rice Toner
The rice toner can be incorporated into your skincare routine in several ways :
- As a Toner : After cleansing, apply the rice toner to your face with a cotton pad or by gently patting it in with your hands to help balance and tone the skin.
- As a Face Rinse : Use the rice water to rinse your face, providing a soothing and brightening effect.
- As a Mist : Pour the rice toner into a spray bottle and lightly mist your face during the day for a refreshing hydration boost.
Storage and Shelf Life
Because DIY rice toner contains no preservatives, it should be stored carefully :
- Keep the toner refrigerated to maintain freshness.
- Use within 5 days to avoid spoilage or bacterial growth.
Benefits of Rice Toner
Using rice toner regularly can provide multiple benefits :
- Brightening : Rice water helps to even out skin tone and reduce dullness.
- Softening : It leaves skin feeling smooth and hydrated.
- Soothing : Rice water can calm irritated or sensitive skin.
- Anti-aging : Rich in antioxidants, it may help combat free radicals and slow down signs of aging.
Important Tips and Precautions
While rice toner is generally safe for all skin types, keep these points in mind :
- Conduct a patch test before full application to check for allergies or sensitivity.
- Do not leave the rice toner on your skin for too long without rinsing, as prolonged exposure might cause dryness.
- Use the toner 1-2 times per week or as needed to avoid overwhelming your skin.
Summary
The DIY Rice Toner is an affordable, natural solution for enhancing your skincare routine. By harnessing the brightening and moisturizing properties of rice water, you can achieve clearer, softer, and more radiant skin without spending money on commercial products. With simple preparation, careful storage, and mindful use, this toner is a fantastic addition to any beauty regimen aiming for that coveted Korean glass skin glow.
DIY Green Tea Toner
The DIY Green Tea Toner is a classic and time-tested Korean skincare remedy, highly regarded for its benefits on acne-prone and sensitive skin. This toner harnesses the powerful antioxidants found in green tea, which help soothe the skin, reduce inflammation, and protect against environmental damage. It is a simple, natural, and affordable way to refresh your skin without relying on expensive commercial products.
How to Make Green Tea Toner
Creating your own green tea toner at home is straightforward and requires only a few ingredients and minimal preparation :
- Bring fresh water to a boil.
- Pour the hot water into a cup containing a green tea bag.
- Allow the tea to steep for 5 to 10 minutes. It’s important not to steep the tea too long, as prolonged brewing may increase the acidity, which could irritate your skin.
- Once brewed, let the green tea cool until it reaches lukewarm temperature.
- Optional : Add a small amount of aloe vera gel for added moisture and soothing benefits. Aloe vera complements green tea’s calming properties, making this toner even more effective for sensitive skin.
- Pour the cooled green tea toner into a clean bottle for storage.
Usage and Storage Tips
Proper usage and storage of your DIY green tea toner are essential to preserve its efficacy and safety :
- Use as a toner or mist : You can apply this toner with a cotton pad after cleansing or transfer it into a spray bottle to use as a refreshing mist throughout the day.
- Refrigerate : Store the toner in the refrigerator to keep it fresh. Since this DIY toner contains no preservatives, it is susceptible to spoilage.
- Shelf life : Use the toner within 5 days to avoid bacterial contamination and to ensure you get the maximum benefits from the antioxidants.
- Patch test : Before applying the toner on your face, especially if you have sensitive skin, perform a patch test to avoid any allergic reactions.
Benefits of Green Tea Toner
Green tea toner offers a wide range of skin benefits, making it a popular choice in Korean skincare :
- Powerful antioxidants : Green tea is rich in polyphenols and catechins that protect the skin from free radicals, which contribute to premature aging.
- Soothing properties : It calms irritated and inflamed skin, making it ideal for acne-prone and sensitive skin types.
- Anti-inflammatory effects : Helps reduce redness and swelling, promoting a clearer complexion.
- Natural astringent : Tightens pores and controls excess oil, which helps prevent breakouts.
- Hydration : When combined with aloe vera gel, the toner also provides gentle hydration and moisture to the skin.
Why Choose DIY Green Tea Toner?
Many commercial toners contain alcohol, synthetic fragrances, or preservatives that can irritate sensitive skin. The DIY green tea toner is free from harsh chemicals, making it a safer and more natural alternative. It’s also cost-effective, requiring only green tea and water, ingredients that are easily available and inexpensive.
Which Skin Type
One of the most common questions regarding DIY skincare remedies is their suitability for different skin types. The good news is that most of the home remedies discussed in this video, including the green tea toner, cucumber mask, and rice-based products, can generally be adapted for all skin types. However, individual reactions may vary, and it is essential to approach DIY skincare with caution, especially if you have sensitive or allergy-prone skin.
General Suitability of DIY Korean Remedies
These natural remedies are designed to promote clear, glowing skin without the use of harsh chemicals. Because they rely on simple, gentle ingredients, they tend to be well-tolerated across a variety of skin types :
- Normal skin : These remedies provide hydration, soothing, and brightening effects, perfect for maintaining balanced skin.
- Dry skin : Ingredients like aloe vera, honey, and yogurt offer moisturizing benefits, helping to soothe and hydrate dry skin.
- Oily skin : Green tea and rice toners can help regulate sebum production and minimize pores, making them beneficial for oily skin.
- Combination skin : These remedies are gentle and can be used selectively on different areas according to your skin’s needs.
- Sensitive skin : While many of these ingredients are soothing, sensitive skin types should proceed with caution and always perform a patch test first.
Patch Testing : Essential Before Use
Since DIY skincare involves natural ingredients, it is still possible to have allergic reactions or irritation. Before applying any homemade product to your face, it is crucial to do a patch test to ensure compatibility :
- Apply a small amount of the DIY product on a discreet area of your forearm.
- Leave it on for 1 to 2 hours without washing it off.
- Observe the area for any signs of redness, itching, swelling, or irritation.
- If no adverse reaction occurs, the product is likely safe to use on your face.
- If irritation occurs, avoid using that specific ingredient or remedy on your skin.
Special Considerations for Sensitive and Acne-Prone Skin
For those with sensitive or acne-prone skin, some natural ingredients may still cause irritation or exacerbate breakouts. Here are some tips :
- Avoid leaving masks or toners on the skin for too long; 10 to 15 minutes is generally enough to gain benefits without risking dryness or irritation.
- Introduce one remedy at a time into your routine to monitor how your skin responds.
- Be cautious with ingredients like honey and almond powder if you have nut allergies or sensitivities.
- Opt for soothing ingredients such as green tea and aloe vera, which are known for their calming effects.
Summary Table : DIY Remedies and Skin Type Compatibility
| DIY Remedy | Best For | Caution |
|---|---|---|
| Green Tea Toner | All skin types, especially acne-prone and sensitive | Patch test for sensitivity; avoid over-steeping tea |
| Cucumber Mask | Dry, normal, and sensitive skin | Check for cucumber allergy; avoid if irritation occurs |
| Rice Mask | Normal to oily skin; brightening and moisturizing | May dry skin if left on too long; limit usage to 10-15 minutes |
| Yogurt Almond Mask | Normal to combination skin | Avoid if nut allergy; patch test for sensitivity |
| Rice Toner | All skin types | Use fresh; avoid fermented if you dislike smell or irritation occurs |
Ultimately, while these DIY Korean skincare remedies are versatile and generally gentle, individual skin reactions vary. Always listen to your skin’s responses, perform patch tests, and adjust usage accordingly to enjoy the best benefits without adverse effects.